
How to Stream with Youtube Live: Best Software to Use
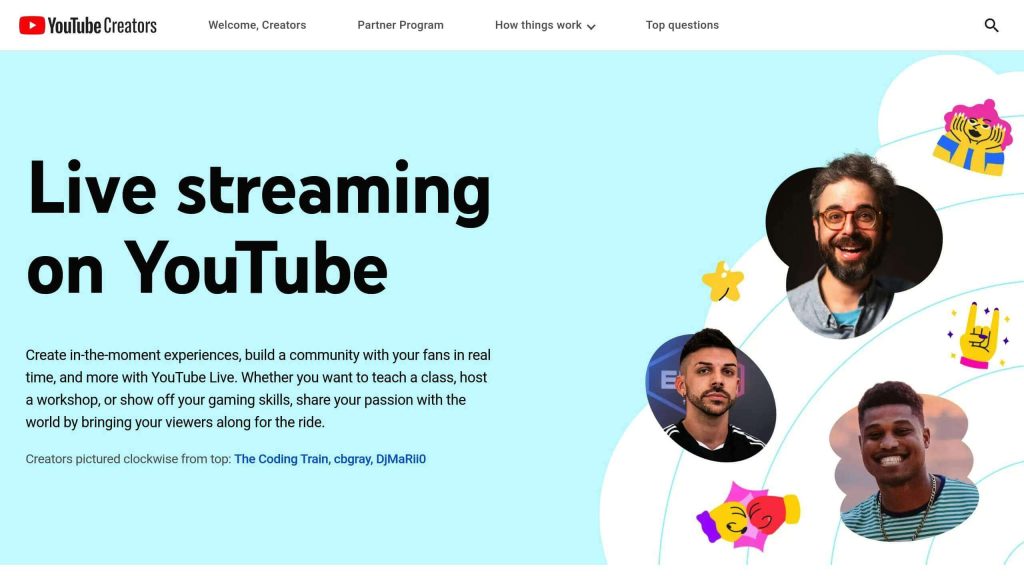
YouTube Live is the platform’s built in feature that allows creators to broadcast video in real time to their audience. Instead of uploading pre recorded content, you can interact directly with viewers as everything happens live. This creates a more personal connection and allows for immediate feedback, questions, and discussion. Learning how to stream with YouTube Live becomes much easier once you understand how real time interaction shapes both viewer engagement and content flow.
You can use YouTube Live for many different types of content. It is commonly used for gaming, tutorials, product launches, live music, podcasts, interviews, educational sessions, and simple community chats. Because YouTube stores past livestreams as videos, your content also keeps generating views long after the live session ends. This makes YouTube Live useful both for real time engagement and long term growth.
What You Need Before You Can Start Streaming
Before you can go live, there are a few essential requirements you must meet. These include both account level permissions and basic technical equipment. Skipping these steps often leads to frustration right at the start.
- Account eligibility: Your YouTube channel must be verified and have live streaming enabled. New channels often require a short activation waiting period before live streaming becomes available.
- Basic hardware: You need a device that can record video and audio. This can be a smartphone, a laptop, or a desktop computer. A webcam and a microphone improve quality significantly, even at beginner level.
- Lighting and environment: Good lighting and a quiet space instantly make your stream look more professional and easier to watch.
- Internet connection: A stable internet connection with reliable upload speed is critical. Streaming depends on sending data out, not downloading it.
Once these basics are in place, you can safely move on to choosing how you want to stream.
Ways to Stream on YouTube Live
YouTube allows multiple ways to go live, and each one suits a different style of content and technical comfort level.
- Mobile streaming: This method lets you stream directly from your phone. It is ideal for live events, travel, behind the scenes content, or quick spontaneous broadcasts.
- Webcam streaming: This option allows you to go live from your browser using your webcam and microphone. It works well for talking head style streams such as Q and A sessions, tutorials, or podcasts.
- Encoder streaming: This is the most flexible method and uses streaming software on your computer. It allows you to mix multiple video sources, capture your screen or games, add overlays, stream alerts, and control audio precisely.
Mobile and webcam streaming are great for simplicity. Encoder streaming is the right choice if you want professional level control. Once you choose encoder streaming, the next step is selecting the actual streaming software that will handle your broadcast. This step plays a central role in determining how smooth your setup for how to stream with YouTube Live will be in real-world conditions.
Recommended Streaming Software for YouTube Live
Once you choose encoder streaming, selecting the right YouTube live streaming software becomes the next practical step. This software is responsible for combining your camera, microphone, screen capture, overlays, and alerts into one live video feed that YouTube can receive. The software you choose directly affects how flexible your setup can be, how easy it is to manage scenes, and how much control you have over audio and video quality.
OBS Studio

Free and open source software that provides full manual control over video sources, audio channels, scenes, transitions, and output quality. It supports advanced features such as multiple scene collections, custom transitions, audio filters, and plugin extensions. OBS Studio is widely used because it allows creators to scale from very simple setups to complex professional layouts without changing platforms. This makes it one of the most flexible YouTube live streaming software options for both beginners and advanced creators.
Streamlabs

A more beginner oriented version of OBS that focuses on fast setup and built in streaming features. It includes integrated alerts, donation tools, chat overlays, and theme based layouts that can be applied with minimal configuration. Streamlabs is popular with creators who want visual effects and interaction tools without spending much time on manual scene design. For many beginners, this makes it an accessible entry point into live stream software for YouTube without a steep learning curve.
XSplit Broadcaster
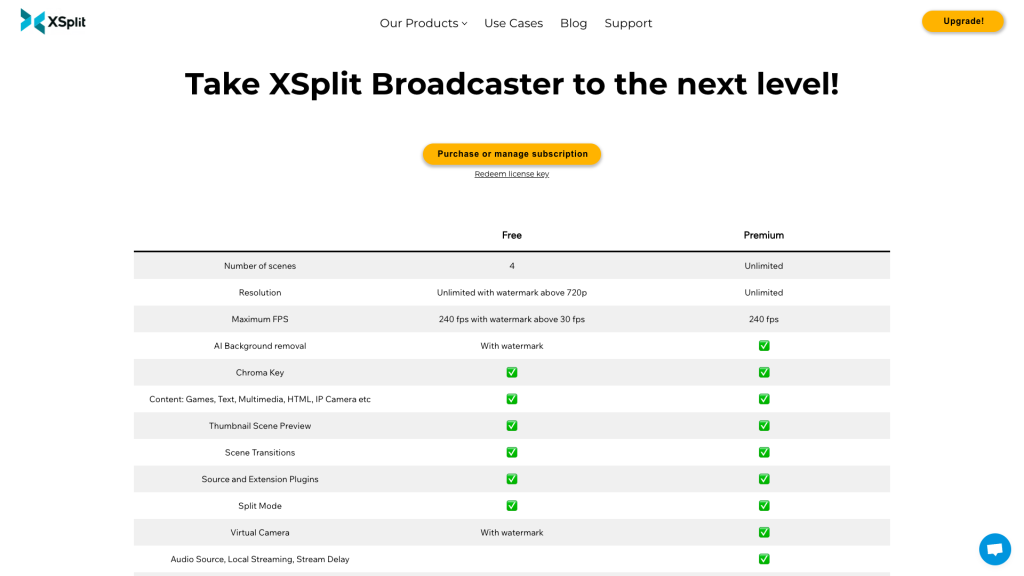
A commercial streaming solution that emphasizes usability and workflow simplicity. It offers a cleaner interface than most open source tools and provides built in scene switching, effects, and screen capture with less hands on configuration. XSplit is often chosen by users who prefer a guided setup and are willing to use a paid license for convenience. Creators who prioritize a clean workflow often see this as an advantage when selecting live stream software for YouTube.
All three software options work reliably with YouTube Live and can be used for both basic and advanced streaming setups. OBS Studio is best suited for creators who want maximum control and long term flexibility. Streamlabs is ideal for fast setup with built in interaction features. XSplit fits creators who want a simpler workflow with minimal technical tuning.
If your content is limited to simple camera based talking, webcam streaming from the browser may still be enough. However, for gaming, screen sharing, presentations, multi camera setups, overlays, and alert driven interaction, proper streaming software becomes essential for maintaining production quality and viewer engagement.
How to Stream With YouTube Live
The overall streaming process follows the same core structure regardless of the method you use. This structure is essential for anyone learning how to stream with YouTube Live for the first time and helps prevent confusion when you first go live.
First, you open YouTube Studio or the YouTube mobile app and choose the option to go live. Then you select your streaming method, whether that is mobile, webcam, or encoder. After that, you configure your stream details, including the title, description, category, and visibility settings. Choosing private visibility allows you to run a private live stream on YouTube for testing, rehearsals, or limited audiences.
If you are using streaming software, you must also enter your stream key into the software and select video resolution, bitrate, and audio input. Before going fully public, it is always smart to run a short private test stream to confirm that everything works.
Once you start broadcasting, YouTube shows you live analytics, stream health, and chat in real time. You can monitor performance and interact with viewers from the control panel.
Quality Settings, Layout, and Audio Basics
Even basic streams can feel professional if quality settings are configured properly. Many new streamers focus heavily on video and forget that audio quality often matters even more.
Visibility and latency
You can set your stream as public, unlisted, or private. This makes it possible to host a fully controlled private live stream on YouTube without exposing the broadcast to the public. Latency settings affect how quickly chat messages appear compared to what viewers see on screen.
Scene layout
Encoder streaming allows you to switch between layouts such as full camera, full screen capture, or split views. This keeps your stream visually engaging.
Audio clarity
A clear voice without distortion, noise, or echo makes a huge difference. External microphones usually sound much better than built in laptop microphones.
A simple but clean setup is far better than a complicated setup that constantly fails.
Internet Stability and Stream Performance
Your internet connection plays a direct role in how smooth your livestream will be. Most streaming problems come from unstable connections or incorrect bitrate settings.
- Bitrate matching: Your stream bitrate must match what your upload speed can handle. Setting this too high causes buffering and dropped frames.
- Resolution choices: Higher resolution looks better but requires more bandwidth and stronger hardware. Many successful creators stream at lower resolutions for stability.
- Wired connection: A wired Ethernet connection is far more reliable than WiFi, especially when multiple devices share a network.
Always prioritize stability over visual perfection. Viewers will tolerate slightly lower quality far more than constant freezing.
Viewer Engagement and Channel Growth
Going live is not just about broadcasting video. It is about building relationships with viewers over time. Engagement is the heart of successful livestreaming.
Talking to your viewers in chat, responding to questions, and acknowledging new arrivals makes people feel noticed. Scheduling your streams in advance helps viewers plan to join. Posting consistent content allows your audience to form habits around your channel.
Stream titles and descriptions still matter. They help viewers understand what your stream is about and improve discoverability. Sharing stream announcements on social platforms or in private communities helps attract new viewers.
Growth on YouTube Live is gradual. Consistency, patience, and authenticity matter more than quick tricks.
Monetization Options on YouTube Live
Once your channel qualifies, YouTube Live provides several ways to earn revenue directly through livestreams.
You can earn from ads shown during streams. Viewers can also support you through paid chat messages and animated stickers. Channel memberships allow fans to subscribe monthly for additional perks. Outside of YouTube itself, sponsorships and affiliate promotions can become income sources as your audience grows.
Monetization works best when your audience trusts you and feels connected to your content. Community always comes before income.
Common Problem and How to Avoid Them
Every streamer runs into technical problems at some point. Knowing what usually goes wrong helps you react faster and avoid frustration.
Lag and dropped frames usually come from weak internet or incorrect bitrate settings. Audio problems come from poor microphones or improper gain levels. Account issues come from missing verification or past policy violations.
The most important advice is to accept that your first streams will never be perfect. Streaming is a skill that improves with practice. Each stream teaches you something new about your setup and your audience.
Conclusion
YouTube Live offers an accessible and powerful way to share real time content, connect with viewers, and grow a community. With a verified channel, basic equipment, and a stable internet connection, you can start streaming without massive investment. Long term success depends on consistency, adaptability, and a willingness to improve with every broadcast.
How to stream with YouTube Live is not about instant popularity. It is about steady progress, real engagement, and delivering value to people who show up to watch you live.
Reliable Hosting for Streamers from HostStage
We at HostStage focus on providing stable, fast, and secure hosting solutions for creators who rely on consistent performance behind their online presence. Whether you are running a stream landing page, community site, or hosting downloadable content for your audience, our infrastructure is built to stay reliable under real-world usage and traffic growth.
Our Business Hosting plan includes 15 GB NVMe SSD storage, 4 GB DDR4 ECC memory, free SSL certificates, nightly backups, and support for multiple domains and subdomains, making it a practical and dependable foundation for websites that support your YouTube Live streaming activity.


