
Optimize Bitrate and Quality for Any Stream Type
Set your bitrate too low, and your video looks pixelated. Set it too high, and viewers face buffering issues. This article breaks down how to find the right settings for smooth, high-quality streams, whether you’re sharing a live event, video, or audio.
Key takeaways for better streaming:
- Video streams: Match bitrate to resolution and frame rate (e.g., 1080p at 60 FPS needs 4,500–9,000 kbps).
- Audio streams: Use 128–320 kbps for clear sound without overloading bandwidth.
- Live events: Prioritize stability with Constant Bitrate (CBR) and keep latency low for real-time delivery.
- Hardware matters: Use GPU-based encoding (e.g., NVIDIA NVENC) for better performance.
- Test before streaming: Tools like OBS and FFmpeg help fine-tune quality and detect issues like dropped frames or buffering.
Video Streaming Bitrate Guidelines
Getting the right video bitrate is key to balancing visual quality and bandwidth efficiency. The resolution and frame rate you choose play a big role in determining the required bitrate. For 720p at 30 fps, aim for 1,500–4,000 kbps with H.264 encoding. If you increase the frame rate to 60 fps, you’ll need to bump that up to 3,500–7,500 kbps to ensure smooth motion and avoid visual artifacts.
For 1080p at 30 fps, a bitrate of 3,000–6,000 kbps is recommended. However, if you’re streaming fast-paced content like gaming or sports at 60 fps, you’ll need 4,500–9,000 kbps to maintain clear visuals during rapid movement.
Streaming in 4K requires significantly more bandwidth. At 30 fps, you’ll need 13,000–35,000 kbps with H.264 encoding, and for 60 fps, that jumps to 20,000–51,000 kbps. Switching to H.265 (HEVC) can reduce these requirements by nearly half while keeping the same quality, but you’ll need to ensure compatibility with your platform and viewers’ devices.
| Resolution | Frame Rate | H.264 Bitrate (kbps) | H.265/AV1 Bitrate (kbps) |
|---|---|---|---|
| 720p | 30 fps | 1,500 – 4,000 | 1,500 – 3,000 |
| 720p | 60 fps | 3,500 – 7,500 | 2,250 – 4,500 |
| 1080p | 30 fps | 3,000 – 6,000 | 1,500 – 4,000 |
| 1080p | 60 fps | 4,500 – 9,000 | 2,250 – 6,000 |
| 4K (UHD) | 30 fps | 13,000 – 35,000 | 8,000 – 20,000 |
| 4K (UHD) | 60 fps | 20,000 – 51,000 | 10,000 – 40,000 |
Next, let’s dive into audio settings to further fine-tune your streaming setup.
Audio Bitrate Settings for Radio Streams
Compared to video, audio streams are much less demanding in terms of bandwidth. For standard stereo audio, 128 kbps with AAC encoding is a great starting point. This setup works well for talk radio, podcasts, and general broadcasts, offering clear sound without straining bandwidth.
If you’re running a music-focused stream, consider increasing the bitrate to 160–192 kbps for noticeably better audio quality while keeping data usage manageable. For high-fidelity music streams or professional-grade broadcasts, 256–320 kbps delivers exceptional sound, though it comes with higher bandwidth requirements. If your stream includes 5.1 surround sound for a more immersive experience, you’ll need to push the bitrate to 384 kbps.
Live Event Streaming: Managing Latency and Quality
Once you’ve nailed down your video and audio bitrates, focus on optimizing live streams to ensure smooth, real-time delivery. Unlike pre-recorded content, live streaming demands consistent performance without interruptions or buffering. Constant Bitrate (CBR) is a must for live streams since it provides a steady data flow that networks can handle reliably. Variable Bitrate (VBR), on the other hand, can lead to sudden spikes that might cause dropped frames.
The type of event you’re streaming also impacts your bitrate needs. For static presentations or webinars in 1080p, stick to 4,500–6,000 kbps. High-motion events like sports or concerts, however, require 6,000–8,000 kbps at 1080p to avoid pixelation during fast-paced action. If your upload speed is a concern, it’s better to lower the resolution to 720p than to risk buffering issues for your viewers.
Latency is another critical factor. Standard RTMP ingress typically adds a 1–2 second delay, which is fine for most streams. However, for events that demand real-time interaction, consider using protocols like WebRTC or SRT, which minimize latency by streamlining the streaming process. While RTMP remains the most universally compatible option, these newer protocols are worth exploring for specific use cases.
Setting Up Encoders for Better Bitrate Control
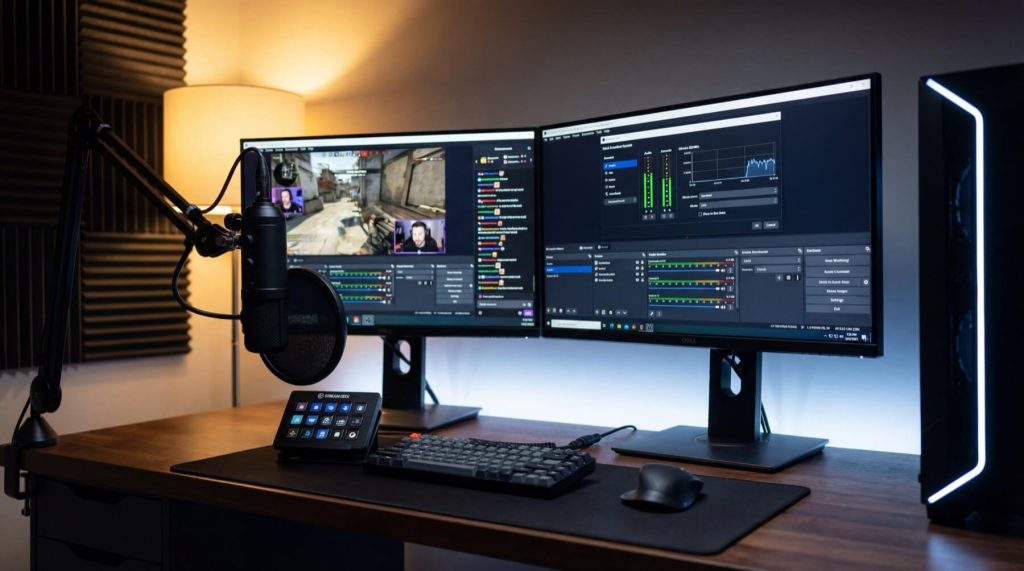
Configuring OBS Studio for Your Stream

Start by launching OBS Studio and navigating to Settings > Output. Under the Streaming tab, set your Rate Control to CBR (Constant Bitrate) for live streaming. This ensures a consistent data flow, reducing the risk of buffering for viewers. If you’re recording content for later upload, VBR (Variable Bitrate) is a better option, though it’s not ideal for live broadcasts.
Next, choose the right encoder. If you’re using a modern NVIDIA GPU (GTX 16-series or newer), go with NVENC H.264 – it’s efficient and has minimal impact on gaming performance. For those with high-performance CPUs, x264 is a solid alternative, though it requires significantly more processing power.
Make sure your bitrate matches your streaming platform’s recommendations. In the Advanced settings, set the Keyframe Interval to 2 seconds to align with most platform requirements.
For audio, head to Settings > Audio and set the bitrate to 160 kbps for general content like gaming or talk shows. If you’re streaming music or podcasts, bump it up to 320 kbps for better quality. Use a sample rate of 44.1 kHz for standard stereo audio or 48 kHz for professional-grade or surround sound setups.
Before going live, run OBS’s Auto-Configuration Wizard in the Tools menu. This tool evaluates your system and internet connection to provide a baseline for encoding and stability. Afterward, do a local recording test by setting the recording quality to “Same as Stream” and capturing 5 minutes of high-motion content. If the video looks pixelated, your bitrate may be too low for your chosen resolution. Keep an eye on the Stats dock to ensure dropped frames stay below 5%.
Once OBS is configured, you can fine-tune encoding further using FFmpeg.
FFmpeg Commands for Precise Bitrate Control
FFmpeg offers precise control over bitrate settings through command-line options. For live streaming, CBR is the go-to choice for stable bandwidth usage. Use this structure to set the target bitrate (-b:v), maximum rate (-maxrate), and buffer size (-bufsize) to the same value:
ffmpeg -i input.mp4 -b:v 5000k -maxrate 5000k -bufsize 5000k -c:v libx264 output.mp4
This command encodes a video at a steady 5,000 kbps, which works well for 1080p streaming on most platforms. For audio-only streams, the -b:a parameter sets the audio bitrate. For example:
ffmpeg -i input.mp3 -b:a 128k -c:a aac output.aac
This delivers clear stereo audio at 128 kbps, ideal for radio streams.
When preparing VOD content, Capped CRF is a great option. It optimizes bandwidth for static scenes while preventing bitrate spikes. Use the following command:
ffmpeg -i input.mp4 -crf 22 -maxrate 5000k -bufsize 10000k -c:v libx264 output.mp4
This balances quality-based encoding with a bitrate cap, making it suitable for both on-demand videos and live streams.
For low-latency streaming, adjust the -bufsize to approximately 30 milliseconds of payload to reduce delay. Keep in mind that platform-specific limits vary – Twitch caps audio at 160 kbps, while YouTube supports up to 320 kbps.
For even better performance, consider switching to hardware encoders.
Using Hardware Encoders for Better Performance
Hardware encoders like NVIDIA NVENC and AMD AMF take the load off your CPU by using your GPU for video encoding. This not only improves performance but also helps maintain low latency, which is crucial for real-time applications like WebRTC.
To enable NVENC in OBS, simply select it as your encoder in the Output settings. In FFmpeg, use the -c:v h264_nvenc parameter instead of -c:v libx264
ffmpeg -i input.mp4 -c:v h264_nvenc -b:v 6000k -maxrate 6000k -bufsize 6000k output.mp4
This command utilizes your GPU for encoding while maintaining precise bitrate control.
If you’re streaming from a VPS, make sure to choose a GPU-accelerated VPS plan to fully leverage hardware encoding. Standard VPS plans rely on CPU encoding, which can struggle with high-resolution or high-frame-rate streams. To avoid overloading your system, aim to keep CPU usage below 80% and GPU usage under 90% during broadcasts.
Using Adaptive Bitrate Streaming (ABR)
How ABR Adjusts Bitrate Automatically
Adaptive bitrate streaming (ABR) ensures smooth video playback by encoding your video into multiple quality levels, often referred to as an ABR ladder. Each quality version is divided into small chunks, usually lasting 2–10 seconds. When a viewer starts playback, their device downloads a manifest file (like .m3u8 for HLS or .mpd for DASH) that lists all available quality options and the locations of these chunks.
The process begins with the player selecting a low-bitrate chunk to start playback quickly. As the video plays, the player continuously monitors the viewer’s internet connection. If the connection weakens, the player switches to a lower-quality chunk to avoid buffering. Conversely, when the connection improves, it automatically upgrades to a higher-quality chunk. These transitions happen seamlessly at segment boundaries, so viewers don’t notice the switch. This adaptability is crucial because poor video quality often leads to viewers leaving early.
“Adaptive bitrate streaming (ABR) provides the best video quality and viewer experience possible – no matter the connection, software, or device.” – Sydney Roy, Marketing Communications Specialist, Wowza
A real-world example of ABR in action is Netflix’s implementation of adaptive audio. They increased audio bitrates from 192 Kbps to 640 Kbps and designed audio streams that adjust dynamically based on network conditions. This ensures consistent, clear sound even when bandwidth fluctuates.
Setting Up ABR for Multiple Devices
To cater to various devices and connection speeds, you’ll need to design an ABR ladder with 3–5 quality tiers. These tiers should cover a range of resolutions and bitrates, such as:
- 360p: 500 Kbps–1.5 Mbps
- 720p: 2 Mbps–5 Mbps
- 1080p: 4 Mbps–8 Mbps
- 4K (optional): 10 Mbps–25 Mbps
It’s essential to include at least one low-quality rendition (below 1,000 Kbps) to accommodate viewers with very limited bandwidth, ensuring playback remains accessible even in poor conditions.
For compatibility, use HLS to support Apple devices and MPEG-DASH for broader codec support across Android and desktop browsers. Set your keyframe interval to 2 seconds to allow quick bitrate adjustments at the start of each new segment. If you’re streaming live events with WebRTC, the server can monitor bandwidth in real time and adjust profiles automatically, which helps maintain sub-second latency.
When transcoding multiple ABR profiles on a VPS, enable GPU acceleration to handle the demanding processing tasks. Without it, your CPU might struggle to keep up, especially when creating multiple quality versions simultaneously. Additionally, fine-tune your ABR ladder based on the type of content. For example, static content like talk shows requires far less bandwidth than fast-paced sports to maintain the same level of perceived quality.
Using Global VPS Locations to Reduce Latency
Latency can make or break your live stream. Studies show that over 90 seconds of buffering causes 60% of viewers to leave, and even brief interruptions can lead to a 40% drop in audience size. This is why the physical distance between your server and your viewers is so critical – shorter distances mean faster data travel.
HostStage operates in 18 global locations strategically placed near major Internet Exchange Points (IXPs), such as Amsterdam, Frankfurt, Los Angeles, Singapore, and Tokyo. IXPs are hubs where internet traffic from different networks converges, ensuring your stream takes the quickest and most efficient route to viewers. For example, if you’re streaming from the U.S. but most of your audience is in Europe, hosting your VPS in Frankfurt or Amsterdam will significantly cut down latency.
Testing and Monitoring Your Stream Quality
Tools for Checking Stream Bitrate and Quality
Once you’ve set up your VPS and encoder, it’s time to ensure your stream delivers the quality you expect. One handy tool for this is MediaInfo, a free application compatible with Windows, Mac, iOS, Android, and Linux. It provides detailed metrics like resolution, bitrate, codec type, and bits-per-pixel. According to Jan Ozer from Streaming Learning Center, a bits-per-pixel value of around 0.1 is usually sufficient for good quality in 1080p H.264-encoded videos. For 8K HEVC content, thanks to its efficiency, that value drops to just 0.039.
For real-time bitrate analysis, Bitrate Viewer (available only on Windows) lets you monitor fluctuations in H.264 streams, helping you identify peaks that could lead to buffering on slower connections. Additionally, platform-specific dashboards can give you deeper insights:
- Twitch Inspector pinpoints connection and encoder issues for Twitch streams.
- Vimeo Stream Health provides real-time server logs with statuses such as “Good connection” or “Unstable connection.” Vimeo flags instability if it detects a frame rate or bitrate drop exceeding 15% of your intended settings.
- Mux Live Stream Input Health updates every 5 seconds, showing historical data on FPS, audio/video bitrate, and variance.
- YouTube Live Control Room tracks resolution and frame rate automatically, offering built-in health monitoring.
These tools work hand-in-hand with your initial setup, offering continuous feedback on bitrate and frame rate stability. They’re essential for spotting and addressing issues before they impact your stream.
Metrics to Track During Streaming
While monitoring tools are great, knowing what to look for is just as important. Here are four key metrics to keep an eye on:
- Dropped frames: These occur due to network congestion or encoder lag. If frame drops are consistent, it may point to CPU/GPU overload or insufficient upload speed.
- Bitrate variance: While minor fluctuations during high-action scenes are normal, significant variations – especially in a Constant Bitrate (CBR) setup – can indicate that your encoder hardware is struggling. As Mux explains, “A high variance in the video bitrate indicates that the encoder hardware cannot keep up with the encoding load.”
- Frame rate stability: A drop of more than 15% from your target FPS (like 30 or 60 fps) can cause stuttering and trigger platform warnings.
- Upload-to-duration ratio: This measures whether your upload speed supports your playback rate. A ratio under 90% is ideal, while anything above 100% almost guarantees buffering. Studies show that 40% of viewers will abandon a stream after just one buffering issue, so keeping this ratio in check is critical.
To maintain a smooth stream, always use Constant Bitrate (CBR) for live streaming. Variable Bitrate (VBR) is better suited for pre-recorded content, where quality can be fine-tuned after recording. Before going live, test your upload speed during peak hours using tools like speedtest.net or fast.com. Keep in mind that factors like ISP throttling or network congestion can significantly affect your performance.
Finally, follow YouTube’s recommendation of a 2-second keyframe interval for live streams, and avoid exceeding 4 seconds. Longer intervals can disrupt Adaptive Bitrate Streaming (ABR), leading to playback issues for viewers.
Common Bitrate Problems and How to Fix Them
Getting the best stream quality involves more than just setting the right bitrate – it also means tackling common issues that can mess with performance.
Preventing Quality Loss from Over-Compression
If your bitrate is too low for the content you’re streaming, you’ll notice pixelation or blocky visuals, especially in fast-moving scenes like sports or gaming. This happens because the encoder doesn’t have enough data to capture all the details in each frame. For good online video quality, aim for a Bits Per Pixel (BPP) between 0.05 and 0.15. To calculate this, divide your bitrate by the product of your video’s width, height, and frame rate.
For more specific bitrate recommendations based on resolution and frame rate, check out the “Video Streaming Bitrate Guidelines” section. Instead of just cranking up the bitrate, consider switching to a more efficient codec like H.265 (HEVC). It delivers better quality without eating up extra bandwidth.
If you’re stuck using H.264 and still see compression issues, don’t lower your bitrate further. Instead, drop your resolution (e.g., from 1080p to 720p). This reduces the number of pixels the encoder has to handle, keeping the video clearer even at lower bitrates.
Once compression is under control, you’ll want to address other potential issues like buffering or latency.
Fixing Buffering and Latency Problems
After adjusting your bitrate, you might still face buffering or latency problems. These typically stem from either a weak internet connection or an overworked encoder.
To figure out what’s causing the issue, perform a local test in OBS using “Same as Stream” settings. If the recording looks fine but the stream buffers, it’s likely a network issue. If both the recording and stream stutter, your hardware may be struggling with the encoding load.
Follow the 75% rule: set your stream bitrate to 70%-75% of your total upload speed. For instance, if your upload speed is 5 Mbps, keep your bitrate at 3,750 kbps or lower. This leaves room for network fluctuations and overhead. Also, use Constant Bitrate (CBR) for live streaming to avoid bitrate spikes that could overwhelm your connection.
OBS’s Stats window (View > Stats) can help you diagnose the problem. Look for “Dropped Frames (Network)” to spot unstable connections – switch to a wired Ethernet connection if you’re using Wi-Fi. If you see “Dropped Frames (Encoder/Rendering)”, it means your CPU or GPU is overloaded. To fix this, switch from x264 encoding to NVIDIA NVENC, which shifts the encoding workload to your graphics card. Finally, stick to a 2-second keyframe interval to avoid buffering spikes during your stream.
Conclusion
Main Takeaways
Getting your bitrate settings right is crucial to avoiding pixelation and buffering during streams. It’s a balancing act – set it too low, and your video quality suffers; set it too high, and you risk buffering, which can drive viewers away.
Your bitrate should align with the type of content you’re streaming. For example, high-motion streams like esports require 25–50% more data than static content such as webinars. If you’re streaming 1080p60 video, aim for a bitrate between 4,500–9,000 kbps when using H.264. Switching to H.265 can maintain the same quality at nearly half the bitrate. For audio-only streams, like radio, AAC audio at 128–320 kbps provides excellent sound without hogging bandwidth. Always opt for Constant Bitrate (CBR) for live events to ensure consistent data flow, and set keyframes to exactly 2 seconds for better synchronization.
Your hardware and settings should match the demands of your content. Hardware encoders, like NVIDIA NVENC, manage encoding efficiently without overloading your CPU. Additionally, Adaptive Bitrate Streaming (ABR) helps viewers maintain a smooth experience by automatically adjusting quality based on their internet speed, reducing buffering during network hiccups.
Stick to the 75% rule for stability: keep your stream’s bitrate below 75% of your available upload speed. For instance, if your upload speed is 5 Mbps, limit your stream to 3,750 kbps. This leaves room for network fluctuations and protocol overhead. If you’re working with slower home internet or streaming to multiple platforms, consider using a VPS. A VPS offers high upload speeds (1 Gbps or more) and lower latency, thanks to strategically placed servers.
Always test before going live. A 5-minute test recording can help you check both video quality and network conditions. Keep an eye on dropped frames – network-related drops may point to connection issues, while encoder-related drops could mean your hardware is struggling. Instead of increasing bitrate to fix compression problems, try adjusting your resolution. Even minor interruptions can cause a significant audience drop-off, so reliable settings, optimized bitrate, and solid infrastructure are key to keeping viewers engaged.

