
Build a Lightweight IPTV or WebTV Channel Safely
Creating your own IPTV or WebTV channel is easier than you think. You don’t need expensive hardware or a massive budget – just a Virtual Private Server (VPS) and the right tools. Here’s what you’ll learn:
- Why VPS is better than home streaming: Avoid ISP throttling, bandwidth caps, and downtime with a VPS offering 1 Gbps or 10 Gbps ports, 99.9% uptime, and scalable resources.
- Core tools for setup: Use Nginx-RTMP, OBS Studio, and FFmpeg for efficient streaming. Add automation with n8n and ErsatzTV for 24/7 programming.
- Cost breakdown: A VPS supporting 50–100 viewers costs $8–$40/month, depending on your setup.
- Legal and security essentials: Secure your streams with firewalls, token-based authentication, and IP restrictions. Ensure you have proper licensing to avoid DMCA takedowns.
This guide covers everything from setting up your VPS to securing your channel, automating schedules, and staying compliant. By the end, you’ll know how to launch a reliable, scalable streaming channel that fits your budget.
Why Use a VPS for IPTV or WebTV Hosting
Streaming from home might work at first, but it quickly falls apart as your viewer count grows. Residential internet connections just aren’t built for continuous broadcasting. Problems like ISP throttling, upload speed limits, and frequent disconnections will knock your channel offline long before you reach 20 concurrent viewers. A VPS solves these issues by offering infrastructure specifically designed for high-bandwidth streaming. This makes it a solid choice for anyone serious about reliable and scalable streaming.
Key Advantages of VPS Hosting
Streaming at 1080p with a bitrate of 6 Mbps for 100 viewers requires at least 720 Mbps of bandwidth (including overhead). Most home internet connections max out at 10–50 Mbps upload speeds, making this setup impossible. A VPS with a 1 Gbps port can handle 120–130 viewers, while a 10 Gbps port supports over 1,000 viewers with ease.
Location matters, too. Streams served locally result in latency as low as 5–15 ms, compared to 150–180 ms when served from far away. With 18 global data center locations, including Atlanta, Los Angeles, Frankfurt, Singapore, and Tokyo, you can place your stream close to your audience for minimal delays. This ensures smoother performance and a better viewing experience.
VPS hosting also guarantees uptime, avoiding the pitfalls of power outages, router resets, or ISP maintenance that can disrupt home streaming. With a 99.9% uptime SLA, your VPS will experience no more than 43 minutes and 49 seconds of downtime per month – essential for maintaining a 24/7 channel.
Scalability is another major benefit. VPS hosting allows you to upgrade CPU and RAM in minutes to handle sudden spikes in viewers. For example, an audio-only stream at 128 kbps can support over 200 listeners with just one vCPU and 2 GB of RAM, costing around $8–$15 per month. For video streams, setups typically cost $15–$35 per month for 2–4 vCPUs and 4–8 GB of RAM, making it possible to host gaming streams or live events for 50–100 viewers.
Home Streaming vs VPS Hosting Comparison
| Feature | Home Streaming | VPS Hosting |
|---|---|---|
| Uptime | Prone to power and ISP outages | 99.9% SLA with redundant infrastructure |
| Bandwidth | Limited to 10–50 Mbps; throttling common | 1 Gbps to 10 Gbps unmetered ports |
| Latency | 150–180 ms for distant viewers | 5–15 ms with local data centers |
| Scalability | Limited by home hardware | Instant CPU/RAM upgrades available |
| Security | Basic router firewall | DDoS protection, UFW firewall, token-based authentication |
| Maintenance | Manual hardware management | Automated backups and professional monitoring |
Another critical advantage of VPS hosting is its robust security. Unlike home setups, VPS hosting includes features like token-based access and advanced firewall rules to prevent unauthorized access and conserve bandwidth. For example, RTMP port 1935 can be locked down to specific IP addresses, and hardware-level DDoS protection safeguards your stream from attacks that could overwhelm a residential connection. These measures are essential for keeping your channel running smoothly, even when faced with malicious threats.
Software and Tools for IPTV and WebTV
Creating a reliable IPTV or WebTV channel requires specific software to handle everything from encoding video to delivering it seamlessly to viewers. The core tools form the backbone of your setup, while optional tools can add extra functionality like chat features or simplified deployments. Here’s a breakdown of the essential and optional tools to consider for a streamlined and efficient setup.
Core Tools for Setup
These tools are selected for their performance and resource efficiency, especially for VPS-based environments.
Nginx with the RTMP module is the cornerstone of your streaming server. This module transforms Nginx into a powerful streaming platform capable of handling multiple streams, real-time transcoding, and content distribution. It’s lightweight and stable, making it perfect for VPS setups where CPU usage is a concern.
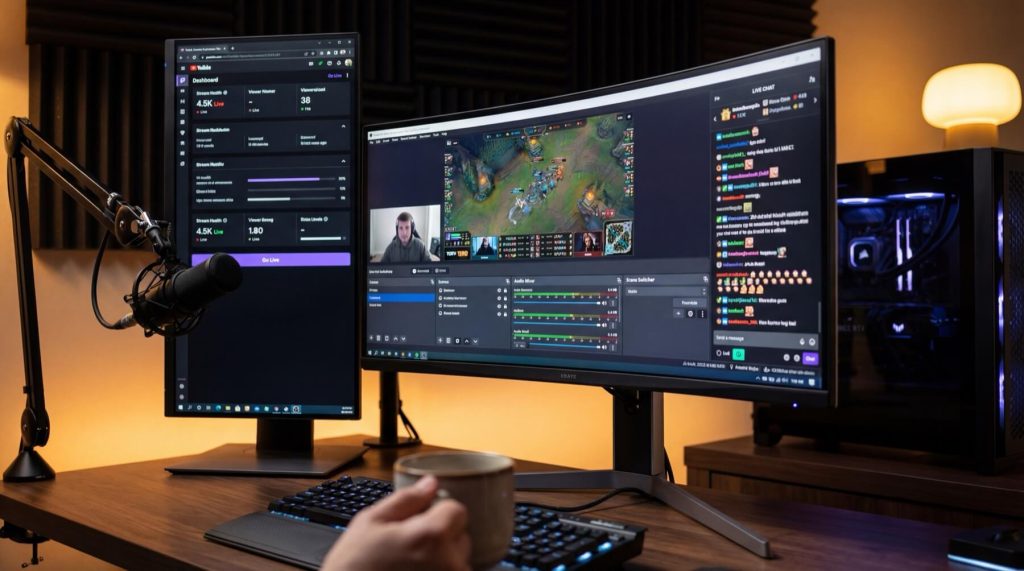
OBS Studio is your go-to tool for video capture and streaming. This open-source software allows you to capture video from your desktop, webcam, or other sources and send it to your VPS via RTMP. By using a custom URL like “rtmp://your_vps_ip/live” and a stream key for authentication, you can easily connect OBS to your server. The obs-multi-rtmp plugin is particularly useful, as it enables simultaneous broadcasting to your VPS and other platforms without doubling your upload bandwidth.
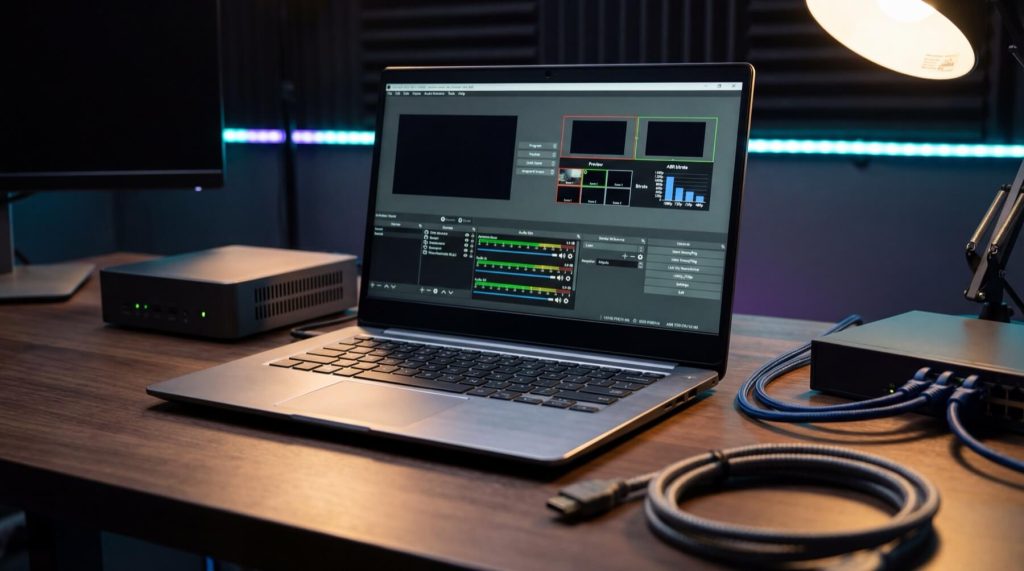
FFmpeg is a versatile command-line tool for server-side tasks like transcoding, recording, and looping video streams. For instance, a 24/7 stream using FFmpeg with an MP4 playlist typically requires about 1.5 vCPUs. If your VPS supports GPU encoding, you can use h264_nvenc to offload the encoding process to the GPU, boosting efficiency.
ErsatzTV is ideal for managing VOD libraries and turning them into live “linear” channels with scheduled playlists. This tool is great for creating a traditional TV-like experience, complete with automated content rotation. Additionally, n8n and cron jobs can automate repetitive tasks. To avoid database issues in n8n, set EXECUTIONS_DATA_PRUNE=true.
Optional Tools for Enhanced Features
Once the core tools are in place, these optional tools can take your setup to the next level.
Owncast is a self-hosted solution that combines a video player with built-in chat and social features. It’s perfect for fostering viewer interaction without relying on external chat platforms.
Docker simplifies deployment by containerizing tools like n8n and ErsatzTV. This ensures consistency across environments and makes updates easier. A containerized setup can be particularly powerful when combining n8n and FFmpeg, allowing for seamless automation of media encoding and streaming tasks.
For embedding your stream into a web player, consider Video.js, HLS.js, or Dash.js. These HTML5 players integrate smoothly with your setup. Additionally, Nginx-RTMP’s stat.xsl module can provide real-time monitoring of your streams.
Content Calendar and Automation Setup
Planning Your Content Calendar
A content calendar helps turn your media library into a well-organized broadcast schedule. It works through four key layers: Media Sources (your video files), Collections (groupings like “80s Action” or “Saturday Morning Cartoons”), Schedules (the timeframes for airing collections), and Playouts (the detailed minute-by-minute playlist). Together, these layers create a predictable and structured programming flow.
Begin by dividing your content into specific time blocks. For instance, you could air “Late Night Noir” films from 11:00 PM to 2:00 AM, followed by looping filler content until the next morning’s programming starts. Tools like ErsatzTV let you organize collections based on genre, decade, or custom tags, assigning them to time slots. You can choose playback styles such as sequential, shuffled, or weighted rotations for variety. To avoid dead air between programs, include pre-roll, mid-roll, or post-roll clips as filler content.
For schedule gaps or maintenance periods, use off-air programming like a looping MP4 file with a branded slate or information screen. To ensure smooth transitions and avoid buffering, use an SSD for your transcode cache and enable HLS Direct mode, particularly on low-power VPS setups.
Once your schedule is in place, automation tools take over to keep everything running smoothly without constant manual input.
Automation with n8n and Cron Jobs
Automation ensures your channel operates seamlessly around the clock. Tools like n8n act as a workflow engine, using schedule triggers (similar to cron jobs), webhooks, or app events to manage transitions between programming blocks. For example, you can create a workflow that switches from pre-recorded content to a live OBS stream at 8:00 PM every Friday, reverting to scheduled playlists at midnight.
To optimize n8n for media workflows, set the environment variable N8N_DEFAULT_BINARY_DATA_MODE=filesystem
so file data is stored on disk instead of memory, preventing crashes during large file processing. Additionally, enable EXECUTIONS_DATA_PRUNE and set EXECUTIONS_DATA_MAX_AGE to 168 hours. This setup can cut response times by 60% and minimize random crashes. Deploy n8n via Docker with the –restart unless-stopped flag to ensure automatic recovery if the system goes down.
External scripts or programs can also control OBS, switching scenes or playing specific media files to enable smooth handoffs between live streams and automated content. Use cron jobs to rebuild playouts automatically, and host both n8n and your playout server on a VPS for reliable, uninterrupted service.
Step-by-Step Technical Implementation
This section walks you through how to deploy and secure your VPS, configure Nginx RTMP, and set up your encoding pipeline. Follow these steps to build a lightweight IPTV/WebTV channel securely.
Provisioning and Securing Your VPS
Start by using Ubuntu 22.04 LTS or Debian 12 as your operating system. Create a non-root user with sudo privileges immediately – this reduces security risks by limiting root access.
The hardware requirements depend on your streaming needs. For basic streaming (50–100 viewers without transcoding), aim for 2 vCPUs, 4 GB RAM, and a 1 Gbps port. If you need 1080p transcoding or multiple outputs, go for 4 vCPUs and 8 GB RAM.
Next, secure your VPS with UFW (Uncomplicated Firewall). Open only the ports you need:
- 22 for SSH
- 1935 for RTMP
- 80 for HTTP
- 443 for HTTPS
Run the following commands:
ufw allow 22/tcp
ufw allow 1935/tcp
ufw allow 80/tcp
ufw allow 443/tcp
Enable HS Shield Firewall from your control panel for extra DDoS protection. For added security, set up SSH key authentication and disable password-based logins to block brute-force attacks.
With your VPS secured, you’re ready to install Nginx RTMP.
Installing and Configuring Nginx RTMP
To install Nginx with the RTMP module on Ubuntu, simply run:
sudo apt install libnginx-mod-rtmp
Once installed, open the Nginx configuration file (/etc/nginx/nginx.conf) and add an rtmp {} block at the end of the file, outside the existing http {} block.
Here’s a basic RTMP configuration:
- Add listen 1935; and chunk_size 4096; to balance latency and CPU usage.
- Define an application block like this:
application live {
    live on;
    allow publish <your_ip>;
    deny publish all;
}
This setup ensures only your IP can push streams, preventing unauthorized access.
For browser-based playback, enable HLS (HTTP Live Streaming) by including the following in your application block:
hls on;
hls_path /tmp/hls;
hls_fragment 2s;
Then, in the http {} section, create a location block to serve the HLS fragments:
location /hls {
    types {
        application/vnd.apple.mpegurl m3u8;
        video/mp2t ts;
    }
    root /tmp;
    add_header Access-Control-Allow-Origin *;
}
Test your configuration with Nginx -t to ensure there are no errors, then reload Nginx using:
nginx -t
sudo systemctl reload nginx
Encoding and Streaming Pipeline Setup
Once Nginx RTMP is up and running, configure your streaming pipeline. In OBS Studio, set the stream URL to:
rtmp://your-vps-ip/live
Use a unique stream key to identify your stream. Under Advanced Output settings, set the Keyframe Interval to 2 seconds – this ensures proper alignment of HLS segments and minimizes playback issues.
For 1080p at 60 FPS, choose a bitrate between 4,500 and 9,500 Kbps, depending on your content type and network capacity. Use hardware encoding like NVIDIA NVENC or AMD VCE if available – this reduces CPU usage significantly.
When using FFmpeg for streaming, include the -re flag to stream at the native frame rate. For H.264/AAC encoding, use the following as a baseline:
-c:v libx264 -preset veryfast -c:a aac -b:a 128k
Keep in mind that a 6 Mbps stream for 100 viewers requires about 600 Mbps outbound bandwidth. A 1 Gbps port can handle roughly 120–130 viewers, considering overhead. Monitor your resource usage during testing, and adjust your VPS plan as needed. For most standard 1080p live streams, expect costs in the range of $15–$35 per month.
Relay Rules, Encoding Best Practices, and Player Testing
Relay and Encoding Best Practices
To ensure smooth streaming and compatibility across devices, use multi-format streaming. Accept streams via RTMPor SRT and output them as HLS or DASH. This approach reduces re-encoding demands and lightens the load on your CPU. For viewers with varying internet speeds, implement an adaptive bitrate (ABR) ladder with multiple quality levels. A common setup might include:
- 1080p at 5,000 Kbps
- 720p at 3,500 Kbps
- 480p at 1,000 Kbps
This setup allows seamless adaptive bitrate switching, minimizing buffering for users on slower connections. Combined with earlier VPS optimizations, these strategies ensure efficient resource management.
Stick with H.264 encoding for broad compatibility. Use Constant Bitrate (CBR) mode to maintain stream stability and avoid sudden bitrate spikes that lead to buffering. Set the keyframe interval to 2 seconds for faster channel switching. For audio, configure AAC at 128 Kbps. If bandwidth is limited, consider Opus at 48–64 Kbps, which offers similar audio quality at half the bitrate.
To enhance security, apply IP restrictions as previously outlined. For lower latency, reduce hls_fragment to 1 secondand maintain a 10-segment window. Align worker_processes with your CPU cores and adjust worker_connectionsbased on expected viewer load. If you’re using SRT, set latency to at least 2.5 times the RTT to handle packet loss effectively.
Testing Playback and Player Compatibility
Once your relay and encoding settings are optimized, test your stream’s performance and compatibility before going live. Use VLC Media Player for initial testing. Enter your HLS URL (e.g., http://your-vps-ip/hls/stream.m3u8) or RTMP URL (e.g., rtmp://your-vps-ip/live/stream_name) in VLC’s network stream option. Since VLC works on Windows, macOS, and Linux, it’s perfect for cross-platform testing. Verify that the video and audio are in sync and that the stream starts within 3–5 seconds. If playback stutters or buffers, check your bitrate and keyframe interval settings – they might need adjustments.
For HLS streams, ensure your M3U8 playlist is formatted correctly. You can test this by loading it in a browser or using tools like MediaStreamValidator. Modern browsers like Chrome, Safari, and Edge support HLS out of the box, so no additional plugins are needed. If you’re using ErsatzTV to create playlists, confirm that the HLS Segmenter mode is active. This ensures proper handling of program boundaries and supports features like watermarks. Avoid using “Video Passthrough” mode unless your source encoder generates HLS-compliant segments, as it can lead to playback errors or high latency.
To ensure everything runs smoothly during live streaming, monitor your stream’s health in real time. Use your VPS dashboard or logging tools to track dropped frames, bitrate stability, and connection errors. If issues persist, consider lowering your output quality or reducing the number of ABR variants to stabilize performance. Regular testing and monitoring are key to maintaining a reliable and enjoyable streaming experience.
Compliance, Anti-Fraud, and Safety Guidelines
Compliance with Licensing and DMCA
Running an IPTV or WebTV channel in the U.S. comes with strict legal responsibilities. Federal law requires you to obtain explicit content distribution rights. Under the 1992 Cable Act, retransmitting broadcast signals without proper permissions and paying the necessary fees is prohibited. The U.S. Supreme Court’s Aereo decision further clarified that retransmitting broadcast programming without authorization is considered an unlawful public performance. If your stream includes music, you’ll also need licenses from performing rights organizations like ASCAP, BMI, or SESAC. Keep in mind, personal streaming subscriptions don’t cover broadcast rights – you’ll need commercial licenses for that.
To protect yourself under the DMCA’s “safe harbor” provisions (17 U.S.C. §512), you must register a DMCA agent with the U.S. Copyright Office, enforce a repeat-infringer policy, and respond promptly to takedown requests. Noncompliance can lead to statutory damages of up to $150,000 per work and even criminal prosecution. To safeguard your operations, maintain a detailed audit trail of licensing agreements, royalty payments, and communications with rights holders. Additionally, draft comprehensive Terms of Service that outline acceptable use, copyright policies, and your right to terminate repeat offenders.
By ensuring both licensing compliance and technical security, you establish the foundation for lawful and reliable streaming. Once these legal bases are covered, the next step is to implement strong anti-fraud measures to protect your channel.
Anti-Fraud Measures and Security Best Practices
Legal compliance is only part of the equation – technical measures are just as important to keep your stream secure. Start with your ingest security by using unique stream keys and IP allowlists. Treat stream keys like passwords: store them safely and rotate them regularly. To further secure your streams, use the on_publish directive to validate session tokens with an external script before accepting a stream.
Minimize vulnerabilities by closing unnecessary ports (e.g., 22, 1935, 80, 443) and securing web interfaces with Let’s Encrypt SSL certificates. Set limits on concurrent connections (e.g., max_connections 100) in your server configuration to prevent DDoS attacks. Use tools like iftop to monitor bandwidth in real time and spot unusual activity. Separating your publish secret from public playback URLs adds another layer of protection against unauthorized access.
| Security Measure | Implementation Level | Primary Benefit |
|---|---|---|
| Publish Secret | Ingest or Encoder | Prevents unauthorized stream hijacking |
| IP Allowlist | Server Firewall / Config | Restricts access to trusted sources |
| SSL (Let’s Encrypt) | Web Server | Encrypts control data and web traffic |
| Connection Limits | Server Config | Reduces risk of DDoS and resource abuse |
Conclusion
Creating a lightweight IPTV or WebTV channel demands careful attention to technical, legal, and operational details. VPS hosting can address many common streaming challenges, such as ISP throttling, internet outages, and hardware failures. With features like a dedicated 1 Gbps network port and consistent uptime, VPS hosting ensures your content – whether it’s a 24/7 gaming channel, live event stream, or internet radio station – reaches your audience reliably. This approach ties together earlier points on reliability and security, laying the groundwork for a stable and scalable channel.
The technical setup is relatively simple: NGINX with the RTMP module is an effective choice for stream ingestion and distribution. Tools like n8n and cron jobs help automate your schedule, while security measures – such as token-based authentication via the on_publish directive, IP allowlists, and SSL certificates – safeguard your content from unauthorized access and bandwidth theft.
On the legal side, U.S. law requires explicit distribution rights for all content. To stay compliant, register a DMCA agent, keep detailed licensing records, and enforce repeat-infringer policies to maintain safe harbor protection. Without these precautions, statutory damages can reach up to $150,000 per work. Proper licensing and documentation, including agreements and royalty payments, are essential to avoid legal risks.
Finally, match your hardware to your streaming needs. A simple live stream requires far less processing power than real-time transcoding. Use monitoring tools like htop and iftop to track your system’s performance, ensuring CPU usage stays below 90% to prevent dropped frames and maintain smooth streaming.
