Throughout this tutorial, you'll learn how to register your own private nameservers using the Namecheap Registrar.
Changing nameservers allows you to make your domain point to your web hosting services.
Find all the steps below to perform your nameservers registration as show below :
ns1.yourdomain.com -> Your IP Address
ns2.yourdomain.com -> Your IP Address
**Nameservers Registration is generally a 2 steps process as far as you need to register them first and then select them as the nameservers to be used.
1) First You would need to login to your Namecheap Client interface.
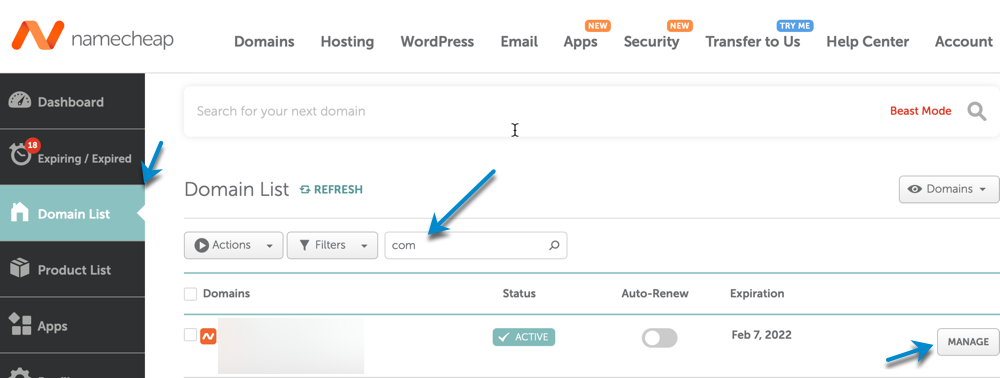
2) Once logged in, you would need to click on "Domain List" and search for your domain Name and click on Manage at the end of the row of the domain you would like to change the nameservers for.

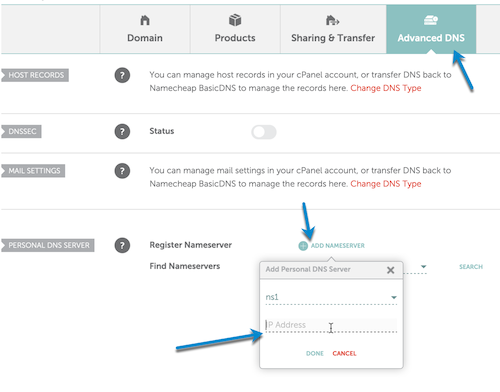
3) You would now need to click on "Advanced DNS". And in the Personal DNS Server, you would need to click on "Add Nameservers" and select in the dropdown the name server name you wish to set (ns1, ns2..). You may then paste the IP address you would like to register the nameservers with.

4) You may replicate the process at least another time for ns1 & ns2. Once you have created the name server, you may configure your domain to use the private nameservers by following the guide below:
That's it, your nameservers are presently registered and ready to be set for any domain you would like to host within the same server.

